Microsoft word.

Microsoft Word (often called Word) is a graphical word processing program that users can type with. It is made by the computer company Microsoft. The purpose of the MS Word is to allow the users to type and save documents. Similar to other word processors, it has helpful tools to make documents.
Microsoft Word is 27 years old. According to Wikipedia, Microsoft Word was released upon an unsuspecting public on 25 October 1983. It's now up to version 14. Not that there have been 14 versions.
What is the meaning of MS Word format?
MS Word Format usually refers to documents created by Microsoft Word and saved in the DOC or DOCX format. MS Word format refers to the document formats developed and used chiefly by Microsoft Word software -- specifically the DOC and DOCX formats.
What is the latest
version of Word?
Microsoft Word 2016 is the latest version of Word. Previous versions include Word 2013, Word 2010, Word 2007, and Word 2003. Word 2016 is compatible with Windows 10, Windows 8.1, and Windows 7.

Microsoft Word 2016 is the latest version of Word. Previous versions include Word 2013, Word 2010, Word 2007, and Word 2003. Word 2016 is compatible with Windows 10, Windows 8.1, and Windows 7.

he Home Tab is about the basics of how text looks when it is printed or displayed online. It gives access to both direct and Style-based formatting. Because of the importance of Styles to using Wordeffectively, it devotes a great deal of space to Styles.I suspect that many Word users seldom stray from the Home Tab. They are missing many opportunities to make Word work for them, but that is not the topic of this page. On this page I intend to examine the control groups on the Home Tab and what each of the controls does. This leads into the Font and Paragraph dialogs and the Clipboard functions of Word.
The Home Tab has its controls arranged in five groups from left to right:

Clipboard -- Font -- Paragraph -- Styles -- Editing
Group names are at the bottom of the Ribbon and groups are separated by a thin line. Most but not all groups have a dialog launcher button in the bottom right corner of the group. The Home Tab shown above is a screenshot from Word 2010. The Home tab has varied slightly through Word versions. These variations are shown at the end of this page.I do not pretend to know what every control does, especially the ones on the dialog boxes. I will tell you what I know. If I am speculating or guessing, I will try to make that clear. As I learn more, this page will be changed. This is a "work in progress."
The Clipboard Group

The clipboard group is on the far left of the Home Tab. It is often used in conjunction with the Editing group, which is on the far right of that tab.
Paste (with options) Ctrl+V: I have been told that when Microsoft studied Word users, they discovered that the most used Command was "Paste"
so when they redesigned the user interface, they decided to give this command prominence as the first button people would see. (The keyboard shortcut in most Windows programs including all versions of Word is Ctrl+V.) The Paste button is actually a drop-down menu of paste choices which is similar to the paste options you see after you paste if you use the the Ctrl+V shortcut. |


Button Drop-Down - Ctrl Key Result
|

The Cut Button is the mouse equivalent of Ctrl+X.
| |||||||
The Copy Button also puts selected text or graphics into the Clipboard. It remains where it is, though.
The keyboard equivalent for this is Ctrl+C. | |||||||
The Format Painter (Brush) (Ctrl+Shift+C to copy formatting, Ctrl+Shift+V to paste formatting)
| |||||||
These all work with the Office Clipboard as well as the System Clipboard. You can see what is in the Office Clipboard by clicking
on the dialog launcher in the bottom right corner of the Clipboard group. |

|

The top of the Office Clipboard Task Pane will tell you the number of items in the clipboard out of the possible 24. If, with the
Clipboard Task Pane showing, you click on one of the items, it will be pasted into your document at the current insertion point
even if it was not the last item placed in the clipboard.
Clipboard Task Pane showing, you click on one of the items, it will be pasted into your document at the current insertion point
even if it was not the last item placed in the clipboard.
|
Note, the (Windows) System Clipboard holds the last item cut or copied. It only holds one item.
The Font Group
The font group has to do with how characters look. It is distinguished from the paragraph group where the formatting handles
the entire paragraph. I am going to divide these controls into three parts:
Let's look at the last two types, first, because there are only two of them.
Change Case:- Note that Small Caps is not one of the options.
Highlighting:-

Highlighting is not considered formatting in Word
Highlighting cannot be part of a Style definition (unlike shading) and is not reversed by the Clear Formatting button.
Next is the Oops button: Clear Formatting, which will strip the effects of the other buttons in the font group from selected text.
Clear Formatting
This says it clears all formatting. This is not accurate. It clears all direct formatting, the same as using Ctrl+Spacebar.
Direct formatting is that not applied using a paragraph style. That is, it returns text to the formatting of the paragraph style.
The Clear Formatting button will clear any of the formatting applied by the remaining buttons in the Font Group as well as any character style formatting.
The following are all considered Direct Formatting by Word and can be cleared by the Clear Formatting button (or by Ctrl+Spacebar).
Font Dropdown and Font Size Dropdown

These have been a part of Word since at least Word 97. You can click on them to give a list to select from or you can type in them.
In the size window you can type a size that is not on the dropdown list. In the Font window you can start typing the name
of a font and it will fill in the first font name that fits as you type.
Increase Font Size - Grow Font
Decrease Font Size - Shrink Font

These two buttons will increase/decrease the size of selected text. The increments are according to the font sizes shown in the
dropdown for fonts except that for smaller sizes it will go in increments of one that can be lower than any shown. The minimum is 1.
Bold (Ctrl+B)
Italic (Ctrl+I)
These two buttons apply Bold or Italic formatting to text. When the insertion point is inside text that has been
formatted as bold or Italic, these buttons will be shaded.
Bold and Italic are toggle formatting. I.e., if you apply bold to text that is already bold, it is turned off.
Both can be applied to the same text, so that you can have text formatted Bold and Italic.
I tend to use the Strong and Emphasis character styles instead of the direct formatting in case of a theme change.
There is no built-in style for that. Applying the style is not a toggle.
Underline (with options) (Ctrl+U)
Clicking on the Underline button will underscore your text. Clicking the little triangle on the right will give you options for
the type of underline you want. Once you select an option, that option is active during your Word session (including in
different documents). The Underline Color brings up a palette. More Underlines... brings up the Font dialog box which has
access to even more underline types.
You can only apply one type of underlining to a character. This is character formatting so you could apply different types to
different characters in the same word.
If text is already underlined and you click on the Underline button, the underlining will be removed.
Strikethrough


The Strikethrough button gives you a single line through selected text. A double line is possible through the
Font Formatting dialog box (below).
If this button is clicked on text that already has double-line strikethrough, it changes it to single-line.
If it is clicked on text that already has single-line strikethrough, that is removed.
The Strikethrough button will be shaded if selected text has a single underline applied.
Subscript
Superscript

These decrease the font size proportionally and lower or raise the baseline.
These buttons are toggles and will be shaded when text is selected to which they apply.
Text Effects

Text Effects lets you apply WordArt type appearance to text in the body of your document. Unlike WordArt, Text Effects can be
applied using Styles.
The Text Effects button is available beginning with Word 2010. The screenshot above is from Word 2013; the last three choices
in the menu are not available in Word 2010.
This works as a gallery, changing the appearance of text as you mouse-over a type.
Also, as you mouse-over, if you pause, you will see background information on the effect.
The Text Effects button only works as a drop-down. Unlike the Underline, Highlighting, and Color buttons which also allow choices,
it will not apply an effect upon being clicked. You need to pick something.
Text Effects work best on larger-size text. On body-size text they will make the text unreadable.
For access to all of the options, you need to use the Dialog Launcher.
I do not pretend to understand all of the choices in this. Here is an Office-Watch page on them.
Font Color

If you simply click on the font color button, it will give you the color shown. That color will be the last one applied to text in your Word session.
If you click on the drop-down, it gives you selections and menu choices.
I try to use Theme colors when they work. That is because if a theme is changed, the color is more likely to fit in.
More Colors gives you access to the full palette
Gradient allows setting multiple colors fading - this is much more effective with larger text.
Name
|
Function
|
New
|
Creates
a new, blank document
|
Open
|
Displays
the Open dialog box so that you can retrieve an existing document
|
Save
|
Saves
the active document to a specified location
|
Print
|
Prints
active document
|
Print
Preview
|
Displays
what the document will look like when you print it
|
Spell
Checker
|
Checks
active document for spelling and grammatical errors
|
Cut
|
Cuts
the selected text and places it on the clipboard
|
Copy
|
Copies
the selected text and places it on the clipboard
|
Paste
|
Pastes
the contents of the clipboard to a new location
|
Format
Painter
|
Copies
the formatting of the selected text to a new text selection
|
Name
|
Function
|
Style
|
Changes
the style of the selected text
|
Font
|
Changes
the font for the selected text
|
Font
Size
|
Changes
the point size of the selected text
|
Bold
|
Makes
the selected text bold
|
Italic
|
Makes
the selected text italic
|
Underline
|
Underlines
the selected text
|
Align
Left
|
Aligns
the selected text/paragraph(s) left
|
Center
|
Centers
the selected text/paragraph(s)
|
Align
Right
|
Aligns
the selected text/paragraph(s) right
|
Justify
|
Justifies
the selected text/paragraph(s)
|
Numbers
|
Creates
a numbered list or numbers the selected paragraph(s)
|
Bullets
|
Creates
a bulleted list or adds bullets the selected paragraph(s)
|
Decrease
Indent
|
Decreases
the indentation of the selected paragraph(s)
|
Increase
Indent
|
Increases
the indentation of the selected paragraph(s)
|
Borders
|
Creates
a border around the selected text/paragraph(s)
|
Highlight
|
Allows
you to highlight specified text
|
Font
Color
|
Allows
you to change the color of the text
|
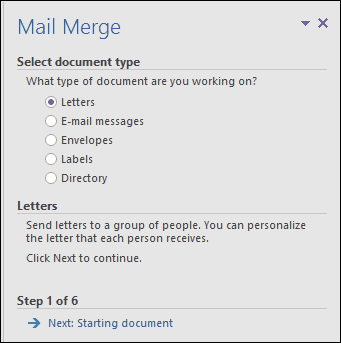
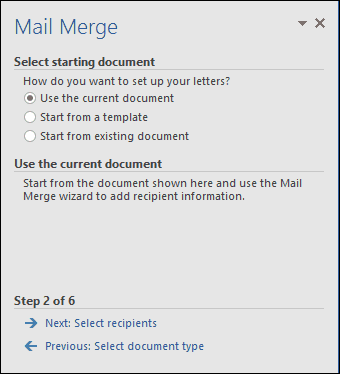
HOW TO USE MAIL MERGE
Start Mail Merge Wizard
Create a new blank document in Microsoft Word and select the Mailings tab > Start Mail Merge > Step-by-Step Mail Merge Wizard.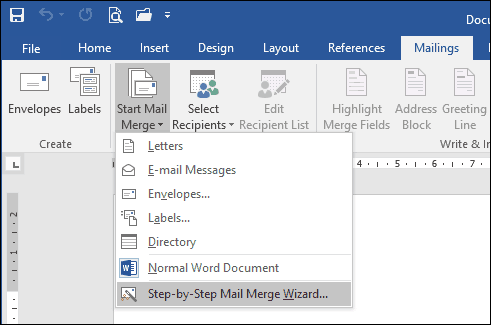
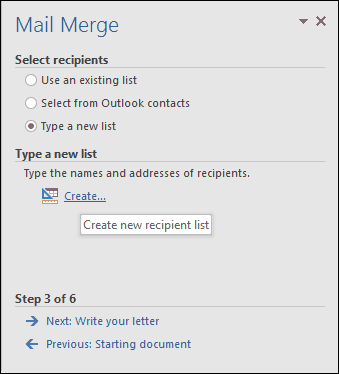
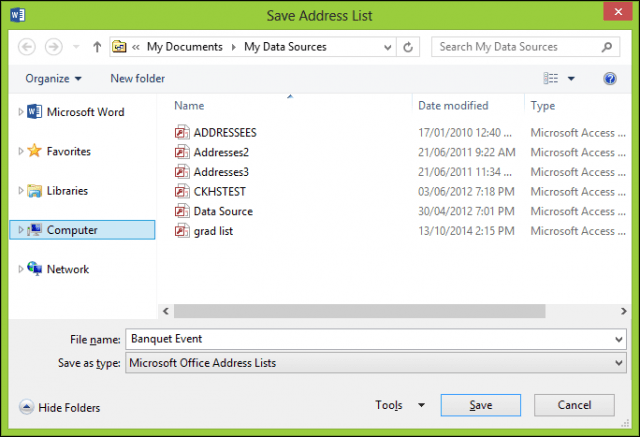
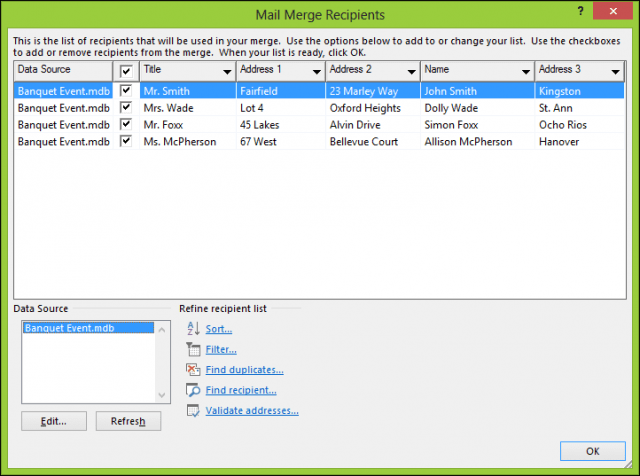
Create and Save the Data Source
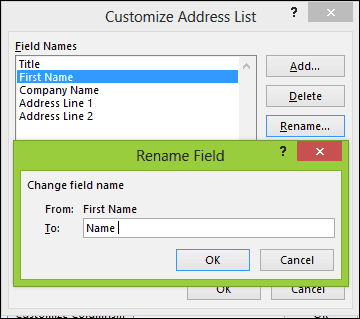
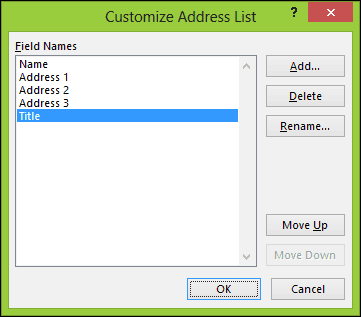
A form with pre-populated fields will be presented. This might not be ideal since we might not want some of these areas and it might confuse us. So we will delete and modify some of the field names; click the Customize Columns button to do so.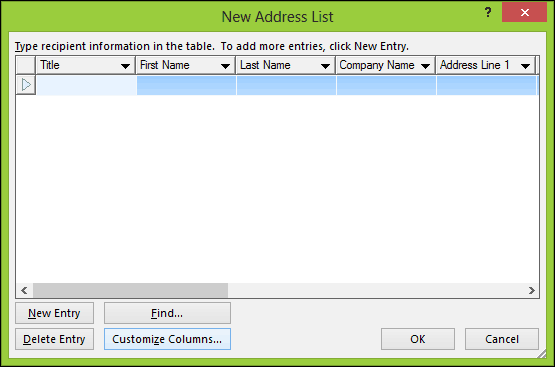


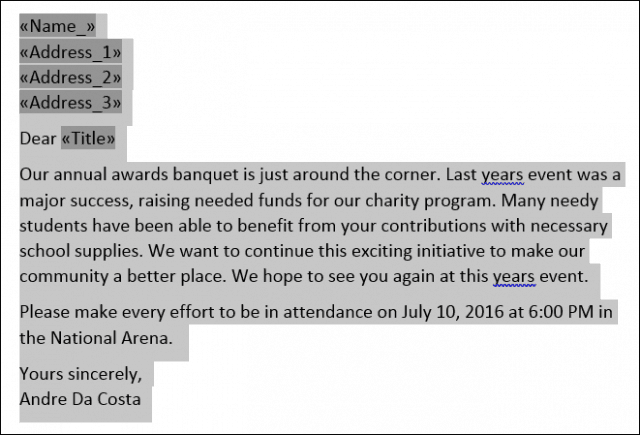
Insert Merge Fields
To insert a merge field, select the Mailings tab, then click Insert Merge Field, then choose your merge field. Repeat the steps to populate your document with the appropriate merge fields.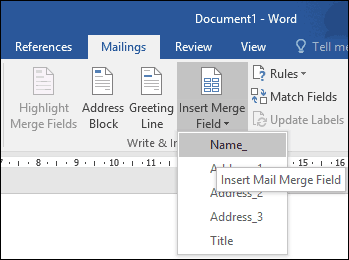
Merge Final Document
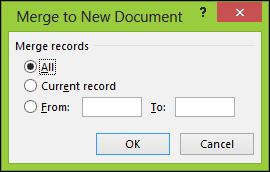
Here comes the fun part, merging your document. Select the Mailings tab, then click Finish & Merge button then click Edit Individual Documents.

No comments:
Post a Comment